Writing Blog Posts
This section is going to get into more of the specifics to pay attention to when writing blog posts. But a lot of these tips can cover pretty much any writing you’re going to do.
Ok, ready to dig in?
Step 1: Know Your Audience
This is an obvious first step, but sometimes it gets skipped. The best blog posts are those that speak directly to their audience.
Understanding who you’re trying to reach makes everything a lot easier.
It helps you pick topics you know your audience cares about. It helps you target keywords or terms that your audiences are searching for online.
And let’s face it, that’s a pretty big deal.
The best content, especially for brands that are desperately trying to convert readers into customers, is directly targeted to a specific audience and their needs.
So, if you’re starting out writing for a new client, think about that.
See if you can get an understanding of who their readers are before you start writing. Read other posts on the site, and think about the topic from the reader’s point of view.
And if you can’t find that information? Ask your client. It’s critically important to know who your audience is before you start writing.
If you start there, you’re going to be getting off on the right foot.
Step 2: Choose (or Get) Your Topic and Research
Ok, this ties into step one.
If you’re a freelancer, your client is probably going to give you the goods on what they want you to write. Sometimes, that’s in the form of a particular keyword. Sometimes it’s a general topic idea. Sometimes, it’s the full headline.
If you’re trying to come up with this for your own site or blog, here’s where you want to dig into your keyword research. Check out these search engine optimization (SEO) tips to help get you started with that.
Psst, even if you are given your keywords, don’t think you shouldn’t learn a little bit about SEO. In fact, for freelance writers knowing a little bit of SEO can help attract more potential clients.
Once you have your topic, it’s time to research.
Let’s face it, you aren’t going to know everything about every topic. So you’re going to have to turn to Google to find out more information.
And that’s fine. You can learn a ton about a topic by reading from other blogs and sites.
Places you can look for information:
Your client: A lot of brands have their own research and sources of information or better access to stuff than you might have.
Always ask your client if they can provide you with information in the form of docs or links to other stuff that might be of use to you as you write.
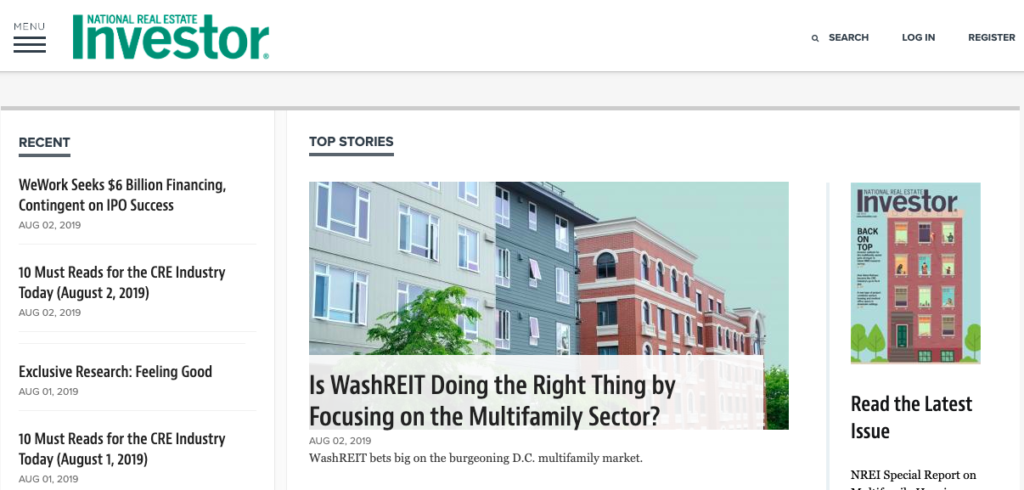
Industry and trade sites and magazines: A lot of these have good interviews with experts that can offer lots of insights and information for your post.
For my real estate clients, for example, I check out a site like this one, National Real Estate Investor:
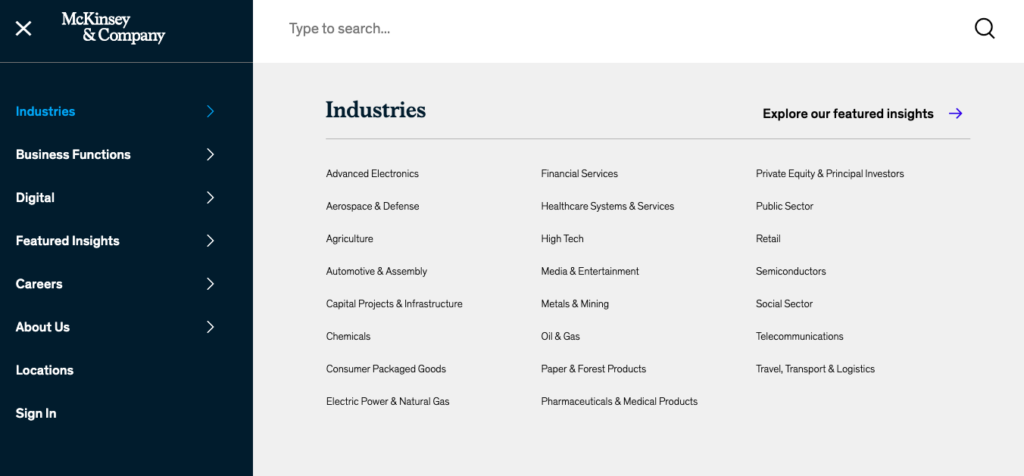
Studies from big research firms: Big name companies and consulting firms (Deloitte, McKinsey, EY) release lots of studies and whitepapers on all sorts of topics, these are amazing sources.
Check out the McKinsey site, they will have all sorts of research and papers on these topics that you can cite in your posts and use for getting ideas.
State or Governmental sites: If I’m writing an article on Social Security, the best place for me to get information is right from the source, the Social Security Administration website.
You can get lots of information on these sites and they usually also have good studies you can cite in your research too.
Industry experts: In any and every industry under the sun there are at least a handful of experts out there putting out content. These people are sometimes called SME’s which means subject matter experts.
So seeing what they are talking about, facts they are citing, and information they are sharing is another great place to research. I’d also suggest adding these people to your industry Twitter lists.
Newspapers and magazines: Trusted news sources like the Washington Post and the New York Times are going to do extensive fact-checking on the information they cite.
So you can feel pretty confident that searching through these will give you some quality information you can use in your research. At the very least, you can pick up some data points and the names of experts they quote to research them a bit more.
Competitor’s sites: I think part of a freelance writer’s job is being pretty good at snooping around! So check out what your client’s competitors are doing, citing, and writing about.
There’s nothing to say, as long as they are using outside information, you can’t talk about the same facts and data too.
Other general websites: Of course, probably the basic form of getting info is just typing your keyword into Google and seeing what pops up. That’s fine too, but just do a little bit of due diligence when you’re looking at posts.
Just because a post ranks highly doesn’t always mean it’s the best information out there. So as you come across trusted sites that always give good information, save those and use them as your go-to.
A few other potential sites that might work for you:
Google Scholar – This is a database of research papers and articles.
Google Alerts – Set up an alert for keywords in your industry to get news stories.
Data.gov – This hosts a bunch of government data you can search.
BuzzSumo – Do a search of the most shared posts on social media for any keyword.
Infographics – A huge database of infographics you can search.
But there are a few things to keep in mind here:
Make sure you learn from reliable sources. There are a lot of clickbait-style sites out there that don’t provide great information.
When possible, try to look to professional (governmental, educational, etc.) sites and known industry experts to learn more.
Don’t be afraid to reach out to experts for quotes you can use in your posts. A tool like HARO is great for this.
Save the sites, reports, whitepapers, etc., where you get your stats so you can link back to them in your post. Always try to link to the original source for any specific data and figures.
Check out some AI tools for help. Remember, some are better for research than others.
As you become more comfortable writing, especially if it’s in a particular niche, you’ll start to see where the good sources of information are versus the not-quite-so-trustworthy sites.
Step 3: Write an Outline
Over the years, I’ve become a huge proponent of outlines.
I used to just bang out a first draft, go over it once or twice for tweaks, and call it a day.
Now I’m sure many of those came out alright; let’s hope anyway. But sometimes, I’d bang my head against the wall because I’d gone way over the word count or had to stop mid-sentence and spend an hour researching and got derailed.
This is where you’ll find the power of outlines, especially detailed outlines.
Now, I’m all in.
I’ve found, as backward as it might seem, that creating a detailed outline first helps:
Keep you super focused on the topic. There’s no way to run off on a tangent unless it’s added to the outline.
Make clear and compelling points. Use your subheadings to keep the article flowing and tie back to the main point of the piece.
Highlight areas where you can add quotes or links to your research or sources. So many articles level up when you add expert quotes or research to them.
See how your SEO is looking. Note where you can insert your keywords into the flow of the work, and make sure everything is optimized.
Speed up the writing process. With an in-depth outline, you can bang out the actual post pretty quickly because you’ve done about 80% of the work by the time you sit down to write.
Don’t write just to hit a word count. Oftentimes short is better.
For example, my outline for this post was over 800 words. I had each of these steps as my subheaders, and then a few bullet points underneath that were just a sentence on key points I wanted to convey.
The great thing about outlines is you can make them as simple or as complex as you’d like. Also, remember your outline doesn’t have to be perfect.
It’s a way to get you focused and help you beat the blank page. It’s fine to tweak and refine as you go.
As you become more experienced with writing, you’ll know what kind of outline helps you get more done and how to become a better writer.
Step 4: Think About Your Headline (aka Blog Post Title)
Some people like to think about headlines right at the very start of the writing process, while others wait until the end. There is no right or wrong approach.
If you’re a freelancer and you got the headline from your client, you’re home-free here. Sometimes, you can think about going above and beyond and writing a few extra headlines that your client can use when you submit your work, but that’s up to you.
If you’re writing without the help of having a headline provided, keep reading.
The good news is that by this point, you should have a pretty good idea of what your headline is generally going to be about. You probably started the whole process with a general working headline.
By now, you’ve got the topic you’re covering, your keyword, and your outline. So you know the direction of your post and the points you want to make that makes the next part easier.
We’ve got a guide to different types of headlines in this post, so check that out.
But here are some of the basics you want to think about as you craft your headline:
Make it something readers want to click. Clicks are the currency of the internet today, so make it stand out (but don’t make it clickbait or have a headline that has nothing to do with the topic).
Think about the problems your readers are trying to solve. People like reading stuff that helps them get answers. You clicked on this post because you had a problem writing a blog post.
Get specific with your headline. It’s great to dig into your topic and let readers know exactly what they are going to learn.
Look at other successful headlines. Great copywriters learn from the pros of the past and often recycle tweaked concepts or approaches. You can do the same. Just don’t copy something word for word!
Come up with a bunch of examples. You’ll very rarely land on a killer headline on your first try. Write out 3-10 and see what stands out. Don’t worry if some of them suck just let it flow.
Alright, can you guess what’s next?
Time to write, fam.
Step 5: Write Your First Draft
If you’ve followed the steps above, you should be very clear on the topic, title, and direction of your post. That’s most of the hard work out of the way right now.
All you have to do is go through your outline and start fleshing things out.
One thing to remember here; this is just your first draft.
It’s ok for your first draft to be kind of crappy. No one ever sends their first draft off to a client (I mean, you really should not do that).
For everything you write, you’ll likely go over it at least twice and ideally more before you submit. So you’ve got time.
What you want to focus on here is getting everything down.
At this stage, it’s ok if you go over the word count, or it’s too short, or you have a few run-on sentences. All of that is going to get refined in future steps.
As you begin writing, here are a few things to keep in mind to help you craft compelling content:
Have a good (short) introduction. You’re going to lose most of your readers in the first few sentences. So catch their attention from the start and make them want to keep reading the rest of your post.
Use examples. Some of my favorite blog writers catch people in right from the start with an interesting example in the intro or sprinkled throughout the post.
Break up your sentences. The first thing that will turn a reader off is a massive block of text. Have short paragraphs, and use subheaders and bullet points to keep the eye moving down the page.
Be efficient with your words. Don’t ramble or go on and on to make a point. Don’t use big fancy words when simple ones will do. These writing tools can help.
Keep the reader in mind. Remember, you are writing for someone. So you want them to learn something or have a laugh or fix a problem or get excited to buy a product. Always keep your reader in mind.
Have a solid conclusion. Don’t add new information here but take a few sentences to summarize your post. Also, add in a call to action at the end to direct the reader to take another step.
As you write more, a lot of this stuff will become second nature to you. Writing is one of those skills that just takes practice.
Here's a look that's a little more in depth:
The general structure of your blog post can look something like this.
Headline
Your headline is one of the most important pieces of your story. You might see the quote going around that 80% of people read the headline and not much else.
So when you work with clients and you have to come up with your own headlines or you have to submit headlines for pitches, brainstorm a bunch first.
Writers who consistently create compelling headlines are usually in demand.
One tool that’s helped me is the Co-Schedule Headline Analyzer. It’s not perfect, but I can type a bunch of headlines in there and see what pops.
Often when I submit my posts, I’ll add in a couple of extra headlines too.
List posts always work great for headlines as well as anything that packs an emotional punch. How to headlines also do well. In most cases, your goal in writing is going to be to help educate readers, keep that in mind both as you write your content and the headlines.
It doesn’t matter what industry you’re writing for, tips, lists, how to’s, and question posts are always going to be an easy lift.
Some examples:
7 Social Security Secrets that Can Save You Thousands
5 Tips on Managing a Team From HR Experts
How Marketers Can Use Gmail for Better Prospecting
Why Accountants Swear by This App
Finally, remember that your headline is the roadmap of your post. You need to have content that delivers on what your headline says.
The headline should be a major focus that you need to tackle at the start so you know how you’re going to write the rest of your piece.
Check out some popular blogs that get a lot of readers and see how they use their headlines. You can use that as inspiration in creating your own, even if it’s in a different industry.
Introduction
Getting someone to click on your post based on the headline is step one.
Hooking them in the introduction is step two.
The people who read past the headline will choose if they want to keep reading based on the first few sentences of your story.
So you want to make sure these pop.
Use this space to hook your reader. You can talk about:
A problem they have and how you can show them the solution
Exactly what you are going to talk about in this post
The promise you cited in the headline
Introductions are good places to add a little bit of emotion to your post. You want to tap into fear, empathy, frustration, and joy.
Do that by relating to your reader, showing you understand them, asking a question you know they have asked themselves or sharing a little story.
Once you get deeper into your intro, start to pivot the conversation to the rest of the post and share why this topic is important or how you are going to help them solve the problem they have.
Body
This is the meat of your post.
Let’s use the example of a list post.
Here’s one:
7 Social Security Secrets that Can Save You Thousands
With 7 tips you’re going to need 7 subsections and 7 headings, one for each secret.
Here’s a secret of my own, if you’re using a list post, try to save the sexiest info for your first and last numbers on your list. That way you grab their attention from the start and you finish on a strong note too.
Plus, it’s psychology most people tend to remember the last thing they hear.
Secret #1: You Can Delay Taking Social Security Until Age 70
Think of your subheads as mini headlines. You get more traction if you write subheads that grab the attention of your reader. And you want to make sure your subheads always tie back to your main headline.
Also always try to keep your subheads in the same format.
Don’t switch to tips if you start with secrets.
Then you write a little mini intro again here. This might be only a sentence or two long.
You might be surprised just how delaying your social security claim by as little as two years can pay off down the road.
Then you write the meat of your section. Keep following the same rules. Use simple language, keep sentences short, think about white space, educate readers and guide them, don’t talk down to them.
Also, try to use examples where you can. And try to keep the patterns the same with each of your sections. So don’t have secret 1 be 500 words and secret 2 be 100 words. You want each section to follow the same format and the same flow.
A big marker for most retirees is 67 1/2, the age you can begin claiming social security benefits. But did you know you don’t have to claim social security then?
In fact, you can wait until you’re 70 to start getting benefits.
What’s the big deal, what’s the difference in waiting?
Turns out, it could be tens of thousands of dollars. Studies by the American Retirement Institute show that retirees who wait those three years can see upwards of 10 additional years of benefits on the back end.
That could come in handy. Especially since retirees are stretching life spans and spending more time in retirement than ever.
Blah, blah, blah.
It’s ok to get detailed here if you need to. It’s also good to give specific actionable advice if the post warrants it.
Next, repeat this process for however many items you have in your list post, following the same general idea. Subhead, mini-intro, mini-meat.
Once you get through all of your points, it’s time to get to the conclusion of your post.
Conclusion
Your conclusion is going to close out your post by summarizing what you’ve written above.
One thing you don’t want to do is add any new information in your summary. Don’t cite some new study and link it in your conclusion either because it’s jarring.
You also want to try to end on a positive note too. The idea of your general post is to encourage and educate and help people so keep it uplifting and positive as you close things out.
You can also include a call to action in your conclusion too. Your clients might ask you to do this, but it never hurts to slide it in on your own. That might be to click to read something else, click to set up an appointment, click to add to the email list, etc.
And as you work with more clients, you’ll pick up good tips and feedback along the way that you can continue to incorporate into your writing for the future.
Step 6: Review and Refine (and Repeat as Needed)
There’s no hard and fast rule about the number of drafts you should bang out on any given post.
However, every writer goes through the process of reviewing a draft and refining it. That might take one or two looks, or it could take seven that’s up to you and, honestly, the time you have.
So once you’ve written your first draft, set it aside for at least a day.
Wait, what?
Yes. I’ve found that giving my eyes and brain space between my first draft and the review and revision process can help clear my mind and judge my work with a more critical eye.
If you don’t have the time to do that, try to step away for at least thirty minutes to an hour.
Once you come back to it, you can start attacking your draft.
At this stage in your draft, it also helps to read your writing out loud.
Reading out loud is an easy way to identify things like run-on sentences or misplaced commas or points that sort of sounded good in our mind but just come out sort of rambly.
For example, if I read this post out loud, my brain would stop on that sentence and say re-write that, but I’m leaving it in to highlight my point.
So this is another approach you can use at this stage. It can help you identify some of the bigger errors your eyes might glance over.
Here’s what to keep in mind during the review process:
Spelling and grammar. Fix any spelling and grammar errors you come across. I use Grammarly to check that, and I’ll also look at the Hemingway App to check my reading level (and if I’ve gone nuts with adverbs).
Check out the look of your post. See how it appears to the eye. Make sure you have enough whitespace, subheaders, images, and all that good stuff that will move the eye down the page.
Give it a general reading first. Here just make sure everything sounds good. Cut where you get too wordy or off track, and add if you think you should make a stronger point. Move things around if it makes a stronger piece.
Review your intro and your subheadings. These are the areas that can make or break your post, so make sure you have an intro that’s compelling and are providing good information throughout your post.
Double-check your links. The last thing you want is a link to nowhere, especially if you are citing data or research, so click all of those too.
Check your SEO. You know your keywords, so go through your post and make sure it’s optimized but not stuffed with the right keywords. Your clients will love that you do this!
Make sure you’re speaking to the audience. Don’t forget about the audience. Review what you’re reading with them in mind, and make sure what you’ve written is easy to understand and drives home the main points in a clear way.
Ok, here again, I think it’s a good time to take a quick break. Step away from your post and think about something else because when you come back, you’re going to get ready to submit.
Step 7: Final Review
Yup, another review.
No, I don’t think this is overkill.
By now, you’ve done 99% of the work. This is just one final read-through to make sure you didn’t miss anything major.
This shouldn’t take you any longer than 10-15 minutes.
Looks good?
Cool, you’re ready for the last step.
Step 8: Submit or Publish
Congrats, you made it!
Depending on if you’re sending this to a client or putting it on your own site, all that’s left to do is put it out there in the world.
You did it.
This method of how to write a blog post isn’t the end all be all or the only way these things work. But it’s a good starting point. As you write more, you’ll develop your own methods and have a system that works for you.
For the time being, you can steal ours.
Now, get out there and write.